
4 ways to build dbt Python models


dbt has become the leading data transformation tool in the Modern Data Stack. With its comprehensive suite of features, including development, testing, and documentation, dbt serves as a central hub for all your data transformation needs.
Although dbt is written in Python, it was originally built to allow only SQL for data transformations. However, as a trend toward convergence amongst various DW vendors rises, in terms of the languages and capabilities of the platforms, dbt Labs worked hard to allow the usage of Python in dbt models.
So, do you feel SQL is a constraint to your transformation process in dbt? Do you want to run complex queries that can not be done by SQL only? Do you want to apply machine learning techniques in your transformation? What if you could have all this transformation logic within your dbt DAG? The wait is over, Python support for dbt is finally here and it's causing quite a buzz in the data community.
In this article, we'll first cover the use cases where Python is a solid alternative to SQL when building dbt models. We will then provide a hands-on approach to creating dbt Python models for Snowflake, Databricks, and BigQuery. To round it off, we will explore the dbt-fal adapter that allows you to run dbt Python code locally.
So, sit back, relax, and grab your favorite beverage, it's time to discover the power of dbt Python models!
Why run Python in dbt?
SQL isn't always the best tool for the job. While SQL is great for querying and transforming data, there are certain types of transformations and data science tasks that it simply can't handle. Python, on the other hand, offers a wide array of libraries and packages that can handle these tasks. By bringing Python to dbt, you can bring data scientists and machine learning engineers closer to your data team, executing all these data processes in a central hub.
The Pandas library is specifically designed for data munging and processing, and it's a powerful tool for exploratory data analysis and data manipulation, especially at the beginning or your project.
Sklearn, Pytorch and Keras are powerful machine learning libraries. Python is the go-to language for machine learning and data science, and there are countless libraries and packages available to help you with these tasks. From training ML models to creating forecasting models, Python has everything you need.
Jupyter Notebooks are extremely handy to create prototypes using notebook environments before copying the code to dbt. This allows you to debug, test, experiment with different approaches before committing to a final solution.
Debugging and testing code can be easier in Python. If you are prototyping your Python code in a Jupyter notebook, you can make use of testing and debugging libraries, while in SQL you can't debug models in an easy way, or just add breakpoints to analyze the code’s behaviour more carefully. Testing Python dbt models is similar to testing dbt models in SQL.
There are many other libraries which can power up your transformations. Check the supported libraries for Snowpark, Databricks and Dataproc.
Why not run Python in dbt?
The first reason to not use Python in dbt is: your data warehouse doesn't support it. Python is supported by dbt, but only for three adapters at the moment: Snowflake, Databricks, and BigQuery. This means that if you're using a different platform (Postgres, Redshift, …), you won't be able to use Python in dbt unless you use third-party packages such as dbt-fal.
Another thing to keep in mind is that while Python can be sometimes more suitable, sometimes it is not. If you have a straightforward way to do it in SQL, do it in SQL. If your code is written in SQL and it works fine, stick with it, you don’t need to translate it to Python, you might even make your models slower if you change to Python.
Additionally, dbt Labs advises against using certain libraries, such as those for creating APIs or handling REST requests, and also against using Python for web scraping and downloading data. But dbt Labs encourage experimentation, and would love to hear about your accomplishments. So, don't be afraid to push the boundaries and see what you can achieve with Python in dbt!
The objective of dbt supporting Python and dbt is to combine the strengths of both languages and work with them in conjunction.
How does dbt interpret Python code?
dbt is all about keeping your data inside your warehouse, so when it comes to running Python code, dbt uses cloud services to run your models, no Python code is run in your machine.
If you're using Snowflake as your warehouse, dbt will use the Snowpark API to run your Python models, this means you don't move data. All of the computations are done within Snowflake, the dbt code is compiled and interpolated by Snowflake and then run as a stored procedure. When using BigQuery (with Dataproc) or Databricks, dbt can use managed Hadoop and Spark clusters to run your Python code.
These cloud services are optimized for running big data processing workloads, and they provide additional features and functionality that are specific to those workloads, such as the ability to run distributed data processing tasks across multiple nodes in a cluster.
However, you'll need to keep in mind that when using these services, you may need to consider additional factors such as cluster sizing, data storage, and network access, to ensure that your Python code runs efficiently and reliably.
What is a dbt Python model?
dbt Python models are similar to dbt SQL models, but instead of being defined .sql files, they're defined .py files. dbt Python models are defined as a function named model that returns a dataframe, while SQL models are defined using a unique SELECT statement. The dataframe type depends on the adapter you're using.
Here's an example of what a dbt Python model might look like:
Don't worry too much about the dbt and session arguments for now, just know that 'dbt' is a class compiled by dbt core and 'session' refers to your platform’s connection. Just like in SQL models, you can reference other models and sources using the dbt.ref() and dbt.source() functions, instead of {{ ref() }} and {{ source() }}, and pass configuration parameters using the dbt.config() function, instead of {{ config() }}.
One thing to keep in mind is that Python models only have two materialization options: table and incremental. So make sure you're not trying to configure your Python model as a view.
Currently, dbt supports Python through three adapters:
- dbt-snowflake (with snowpark)
- dbt-databricks
- dbt-bigquery (with dataproc)
And if you're looking for even more options, there are third-party packages like
- dbt-fal
- Ponder (not yet released)
Before we dive into the details of each adapter, let's make sure to set up our project and a virtual environment to keep your projects organized and isolated from one another. This way, you can follow the tutorial without any hiccups. Are you ready to level up your data skills? Let's go!
Common setup
First, you need to set up our virtual environment. Run the following commands in your terminal:
Next, you're going to grab a copy of the well-known Jaffle Shop repository. This will give us some sample models to work with:
In each tutorial, you will convert the following customer.sql and orders.sql to Python and run them with dbt. You will not explore DS and ML capabilities in this tutorial to keep it simple.
This is how the SQL code in customers.sql looks like.
This is how the SQL code in orders.sql looks like.
You can delete these models from your project as we will be rewriting them in Python:
How to build dbt Python models in Snowflake?
You can build dbt Python models in Snowflake with the dbt-snowflake adapter while your code is run with Snowpark.
Snowflake setup
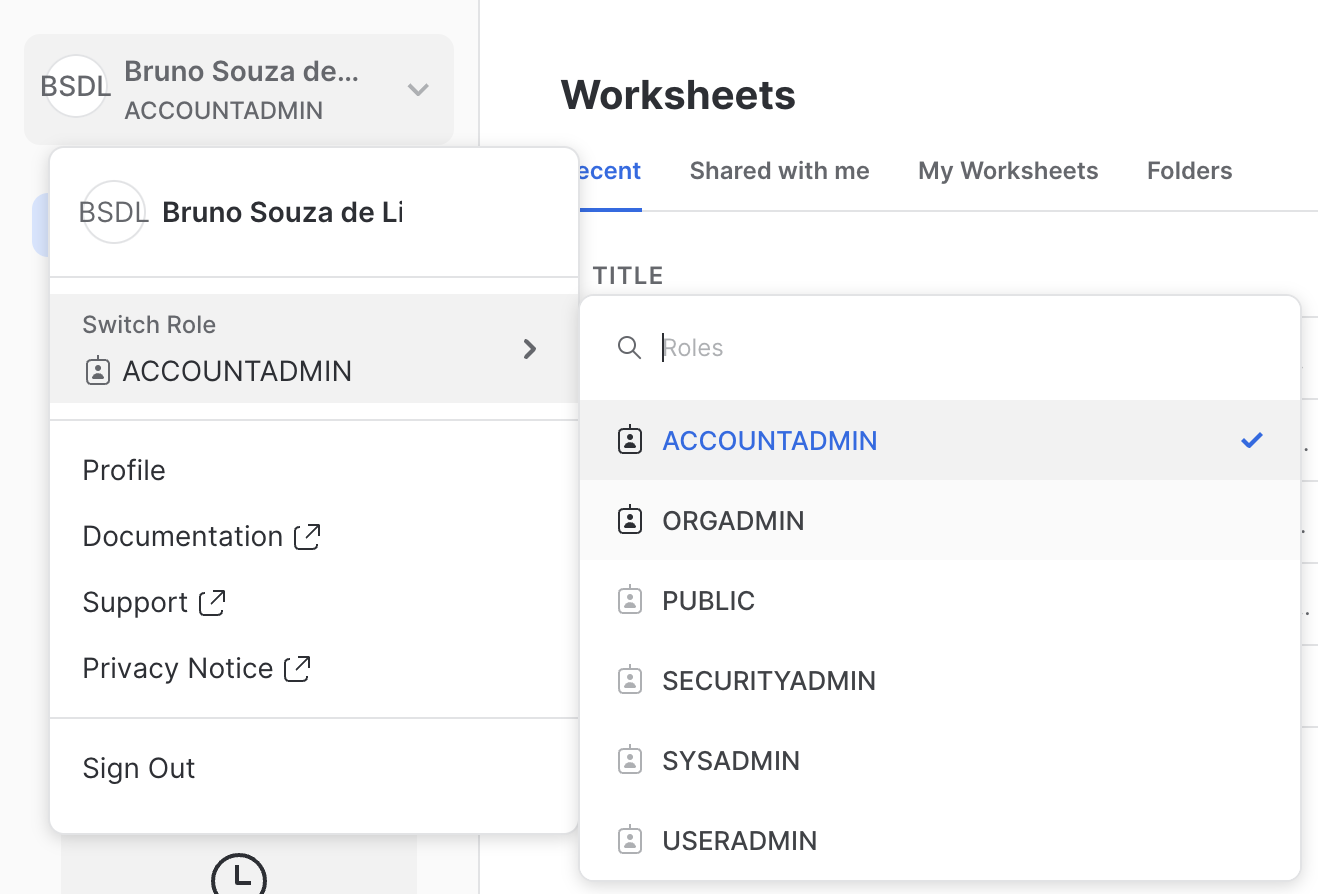
The first step is to have a Snowflake account. If you don't have one yet, you can create a trial account. You can choose any cloud provider as you are not using them in this tutorial. Once you're logged into your account, change your role to ORGADMIN.
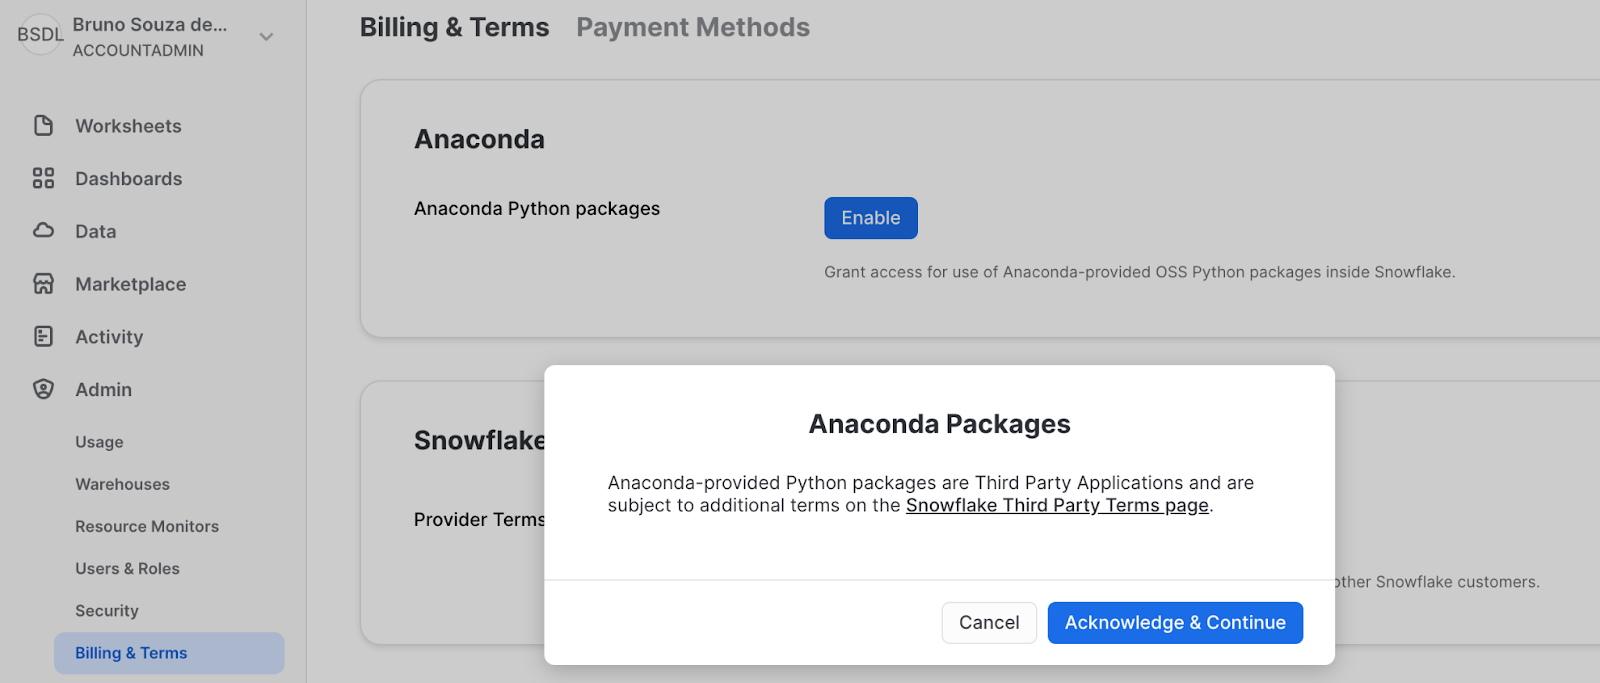
Next, navigate to the Billing & Terms tab and enable Anaconda by accepting the terms and conditions.
Now, go to the Worksheets tab and create a new worksheet. Inside the editor, you'll create a new database, schema, and warehouse.
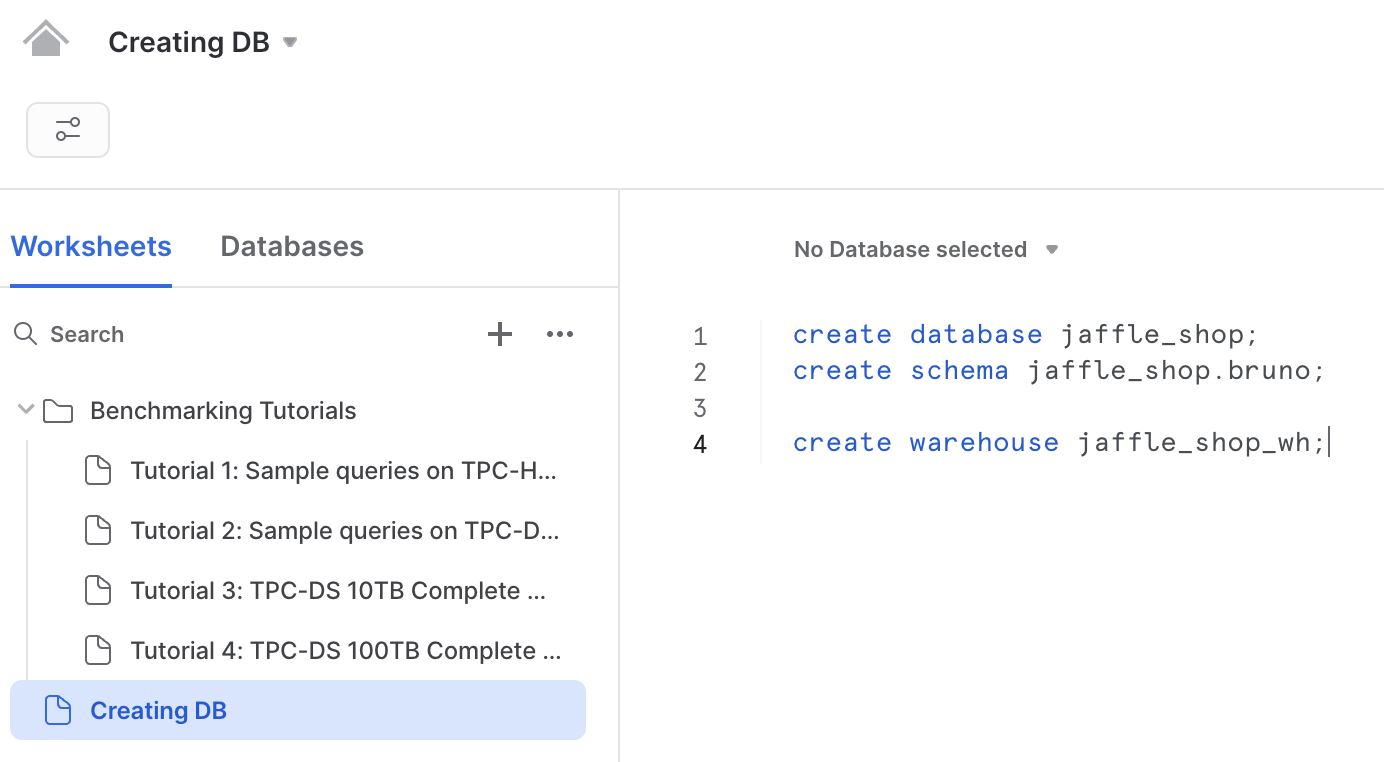
You can copy and paste these commands and execute them one by one:
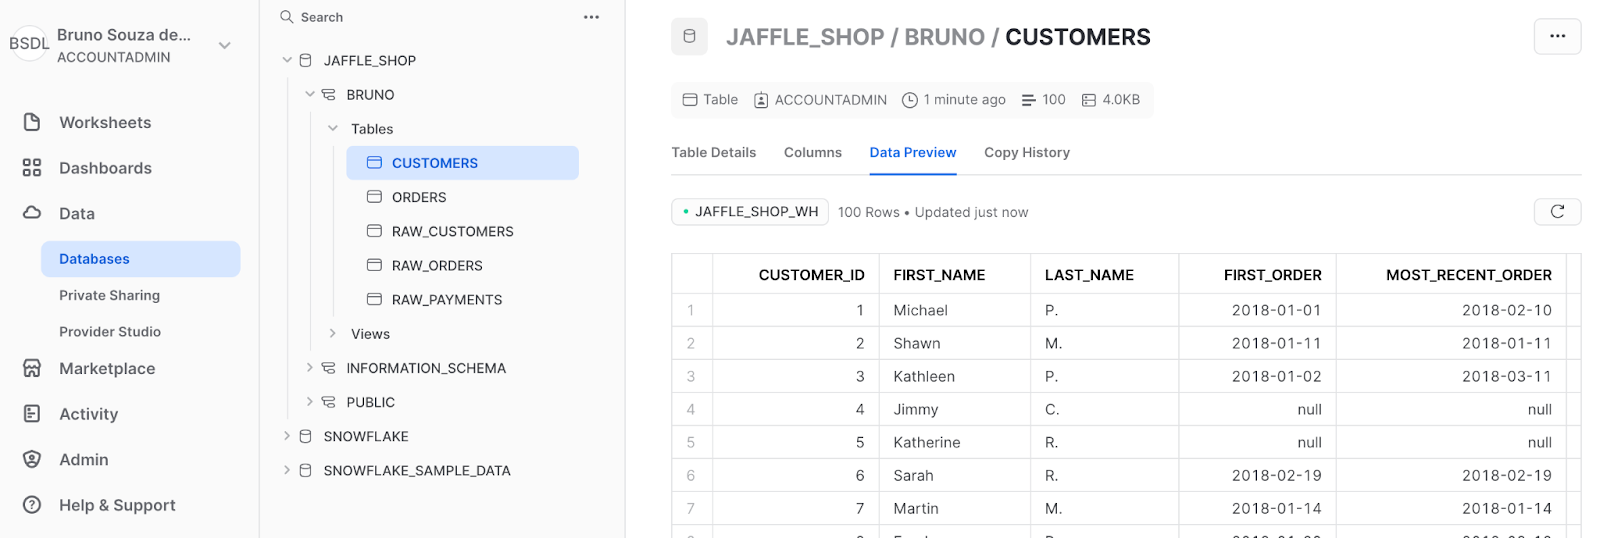
Now that you have a snowflake warehouse and a schema ready, let's see how you can create a dbt Python model.
dbt setup
Install the snowflake adapter in your venv running:
You'll need to create a new profile inside your ~/.dbt/profiles.yml file. Here's an example of what that might look like:
Change [your-user] and [your-password] to the user and password of your snowflake account. You can find [your-account-id] in accounts inside the admin tab. Check the link of your account, it will be like this https://[your-account-id].snowflakecomputing.com.
Create in your models folder the customers.py and orders.py files.
Example customers.py code for defining a dbt Python model in Snowflake.
Example orders.py code for defining a dbt Python model in Snowflake.
These code snippets are basically the SQL code translated to Python. The dataframe you create in your Python code is a Snowpark dataframe by default, which is why you have to import the snowflake.snowpark.functions library to be able to execute some functions.
You can use Pandas dataframes, but be careful. As Jeremy Cohen, from dbt Labs told me "you can convert it [the snowpark dataframe] to Pandas using the to_pandas method. One important callout is that, while Snowpark data frames are evaluated "lazily," converting to Pandas requires the full dataset to be loaded into memory. So any filtering/sampling you want to do, you should do before performing the conversion."
Now run dbt build:

That's it! You built your first Python models in dbt with snowflake.
You can check the repository of the project here.
Pros and Cons
Pros
- Creating a database and warehouse in Snowflake is incredibly straightforward, as is configuring dbt-snowflake to run Python models. You don't need to worry about any clusters, just enable anaconda.
- Snowpark is faster than Databricks and Dataproc if using the trial account or low-cost resources.
Cons
- Your code is more performative if you use snowpark instead of Pandas, but Snowpark is not as widely used as Pandas, so you may need to invest some time in learning its syntax.
How to build dbt Python models in Databricks?
You can build dbt Python models in Databricks with the dbt-databricks adapter while your code is run a Databricks cluster.
Databricks setup
For the first step, you must have an account with one of the cloud providers (GCP, AWS, or Azure). For this tutorial, you'll be using an AWS account, so make sure you have one!
Now you need a Databricks account, If you don't have one yet, no worries! You can create a trial account, just make sure to select AWS as your cloud provider. Once you've done that, check your email for further instructions. After returning from your email, the premium version will be automatically selected. If you're not using a trial account, confirm you have at least the premium version.
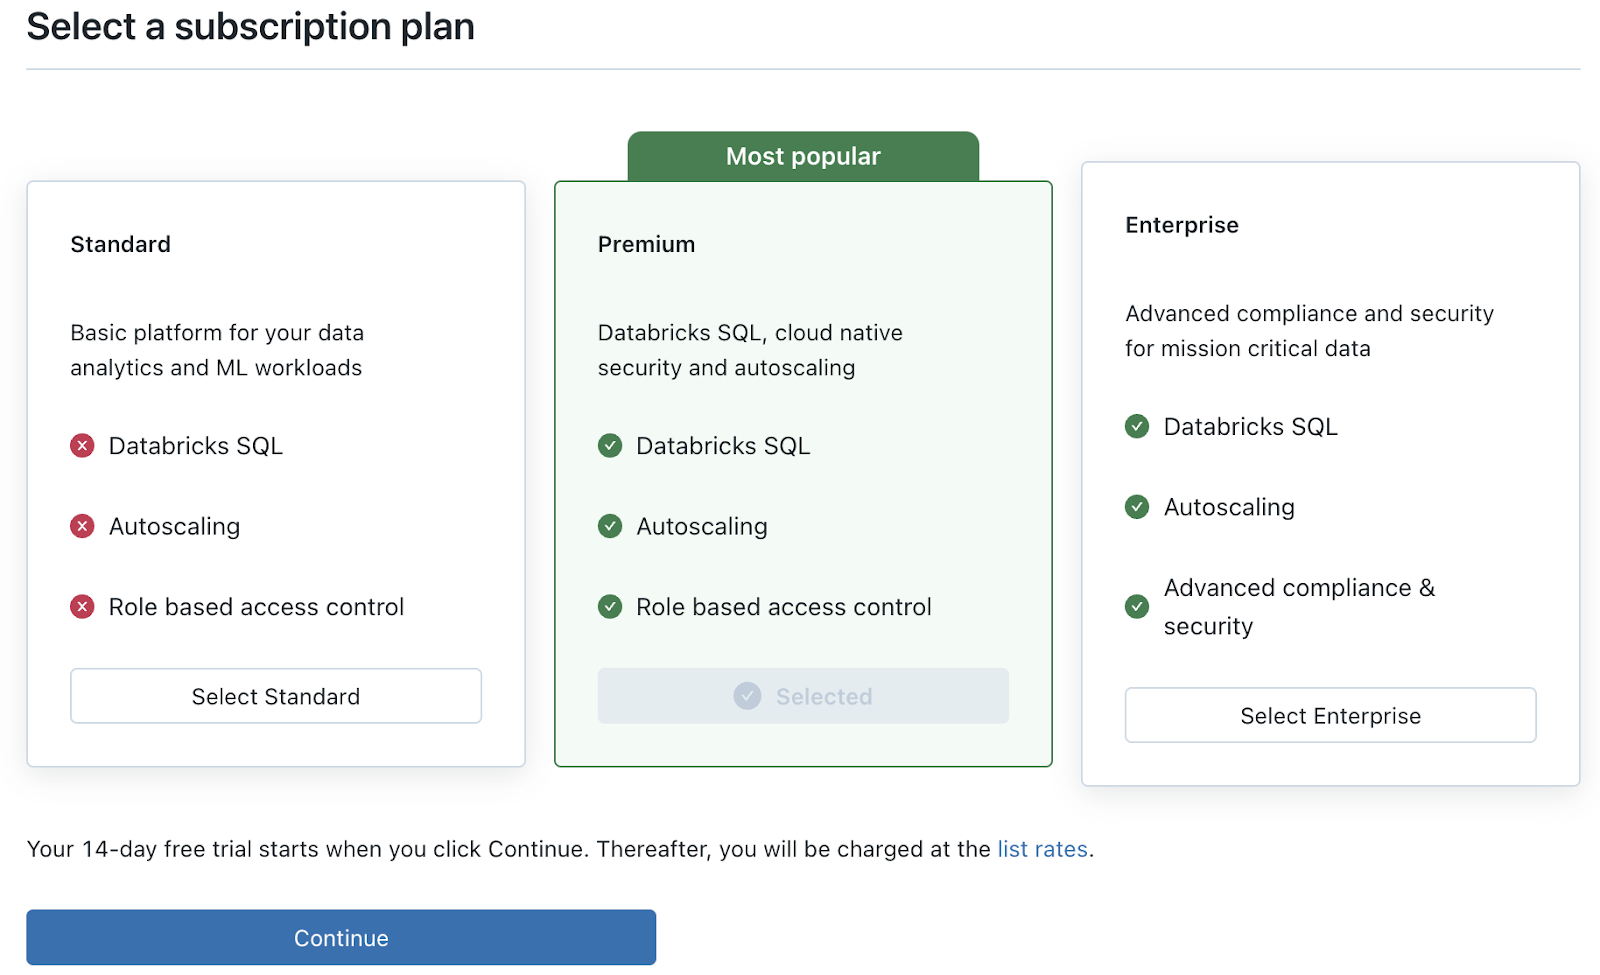
Confirm you have all the requirements and proceed.
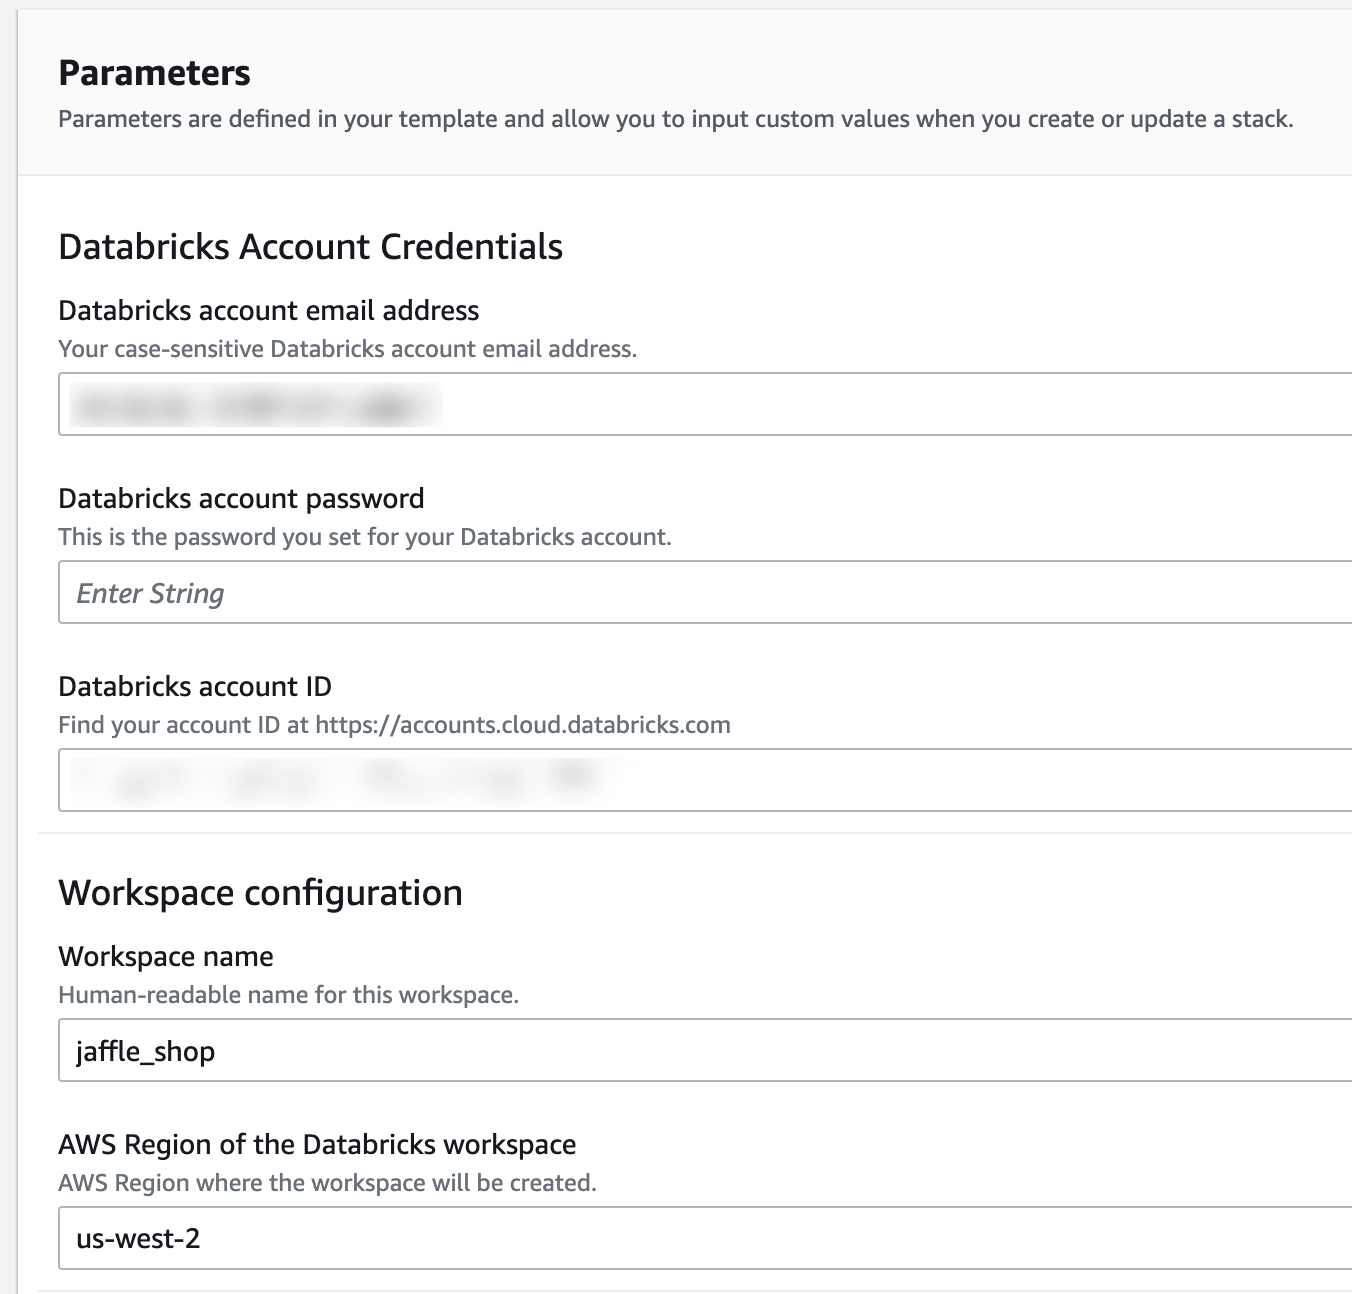
In the workspace setup, name your workspace "jaffle_shop", select your region, and then hit the "quickstart" button. If you're not already logged in to your AWS account, you'll be prompted to do so.
On the next screen, you'll be asked to create a password. So do that, scroll down, then check the "acknowledge" box and click "create stack".
Wait for your stack to be created.
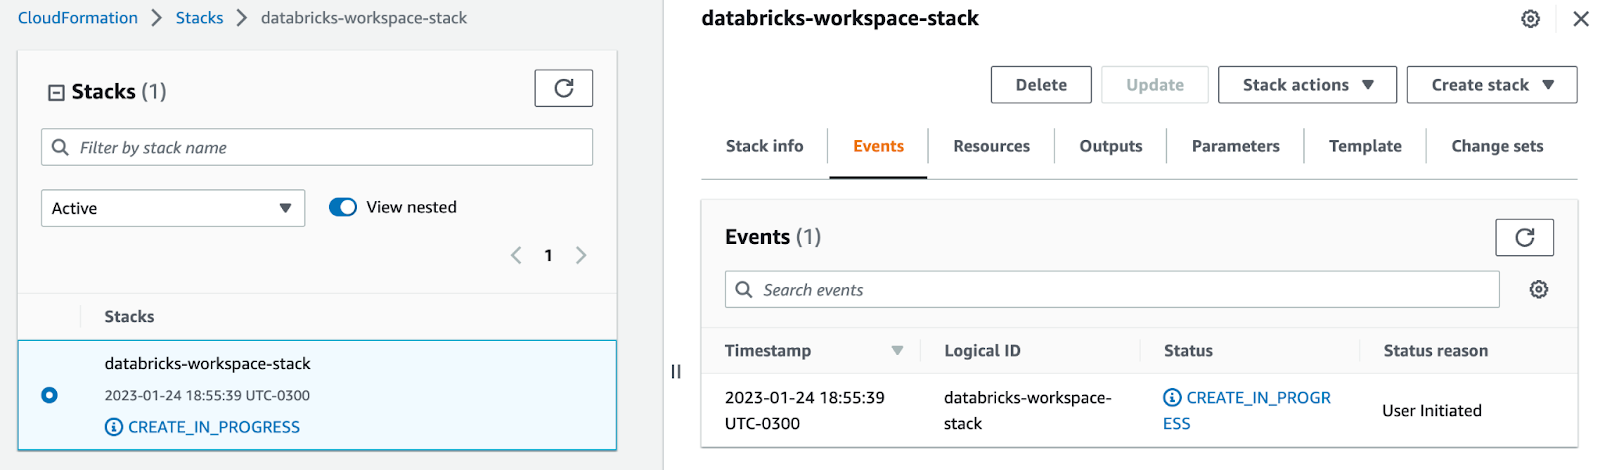
Once your stack is created, head back to the Databricks tab and you'll see your newly created workspace. Click "Open" to enter your workspace.

Inside your workspace, there are three things you need to take note of: the warehouse connection details, the cluster ID, and the account token.
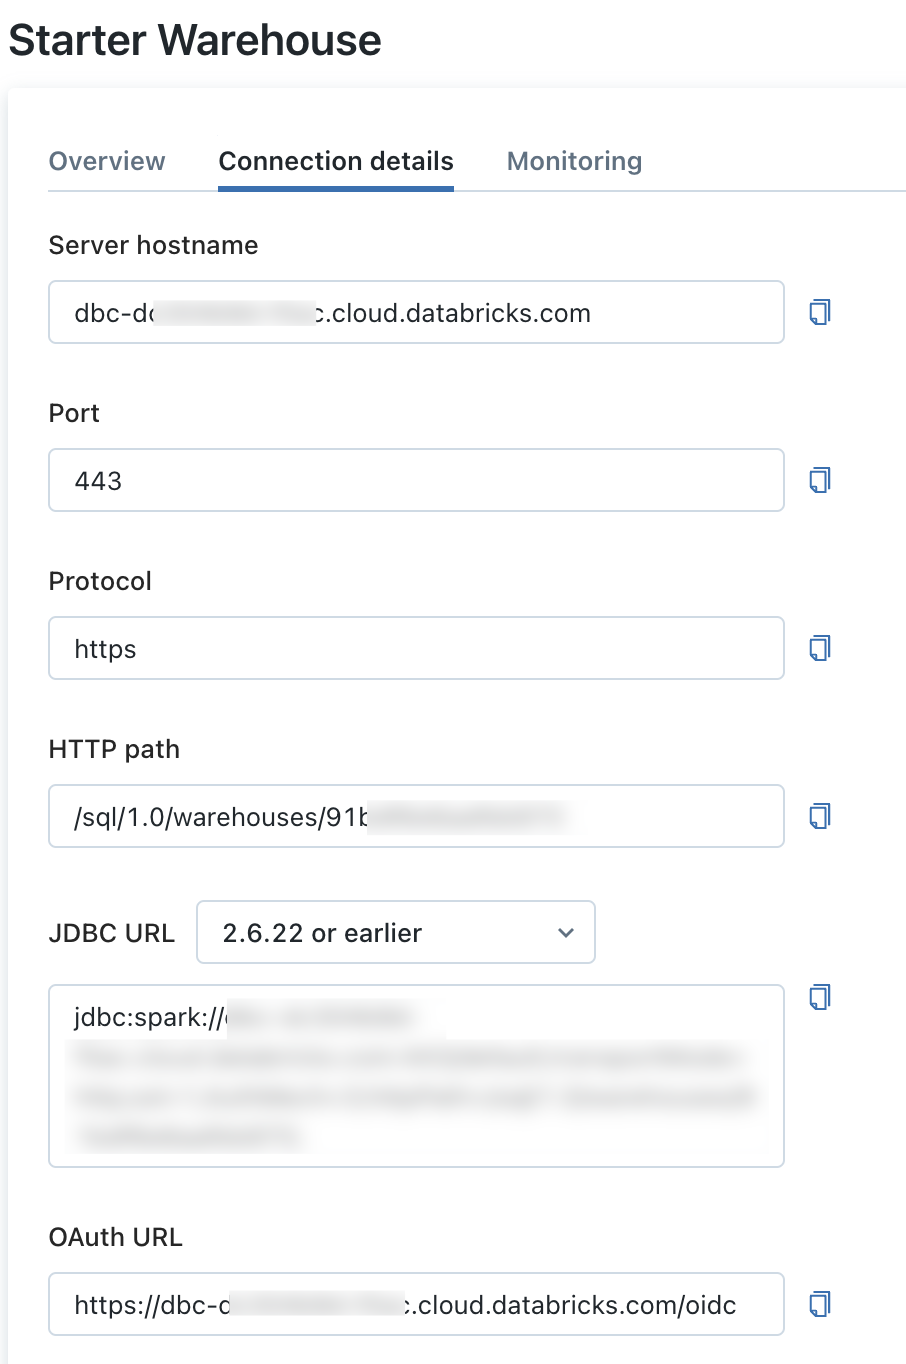
To get the warehouse connection details, go to SQL, then SQL warehouses.

Click on the starter warehouse and then "connection details". You'll need the server hostname and the HTTP path.
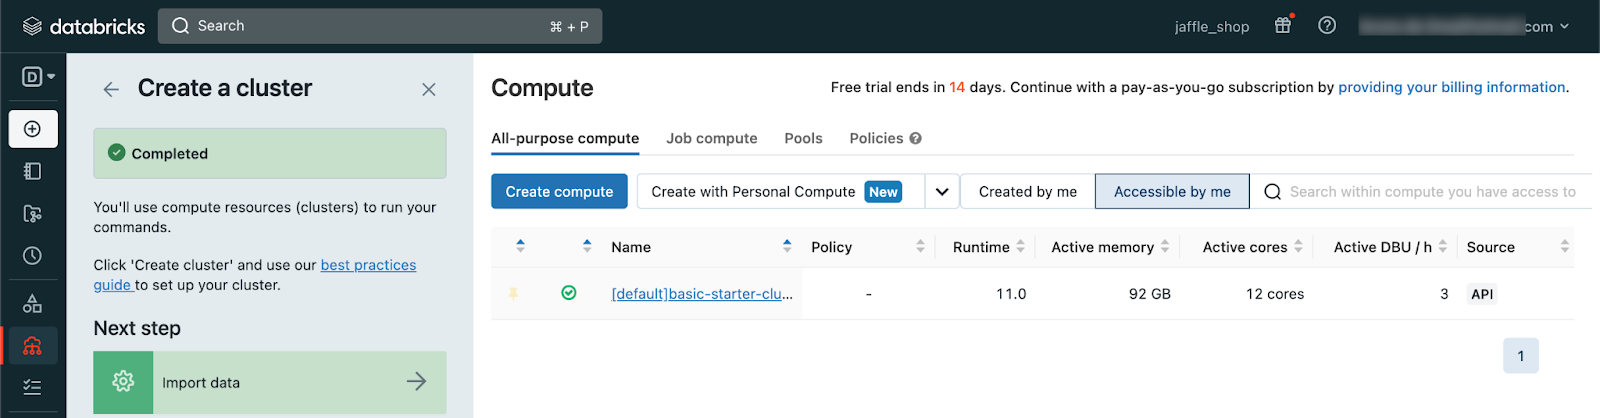
To get the cluster ID, go to Data Science & Engineering and click on "create a cluster". Select the default cluster and check the URL, it should be something like https://[databricks-instance]/#/setting/clusters/<cluster-id>/configuration.
You will need the cluster id.
Finally, to get the account token, go to User Settings under your e-mail and click on "generate new token". It will show you your access token, save it somewhere safe because you won't be able to see it again.
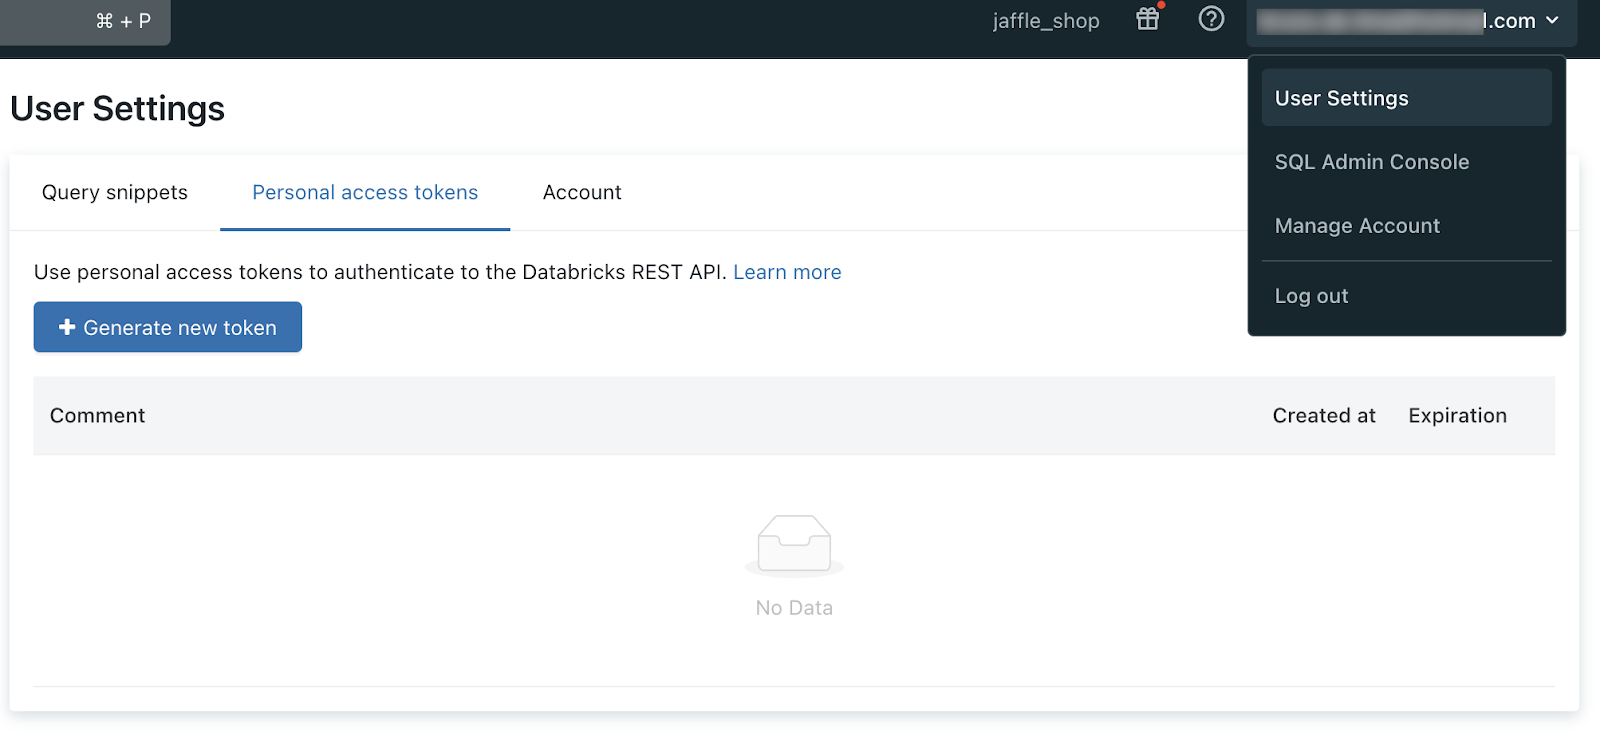
That's it! Now your Databricks workspace is set up and ready for use.
dbt setup
Install the databricks adapter in your venv:
You'll need to create a new profile inside your ~/.dbt/profiles.yml file. Here's an example of what that might look like:
Example customers.py code for defining a dbt Python model in Databricks.
Example orders.py code for defining a dbt Python model in Databricks.
Dataframes in Databricks are by default Apache Spark Dataframes, so you have to use PySpark, and that's why you import the pyspark lib with "import pyspark.sql.functions as F". You will note the code is very similar to the snowpark ones. There are a few differences as groupby instead of group_by, and some additional aliases on the joins to avoid pyspark ambiguity errors.
But one thing you have to remember is that you need to specify a cluster for the Python code to run. And this is made inside the config function. Additionally, you can make your code run faster by setting the "create_notebook" parameter to "False".
You can learn better about these parameters in dbt's documentation. Now run dbt build:
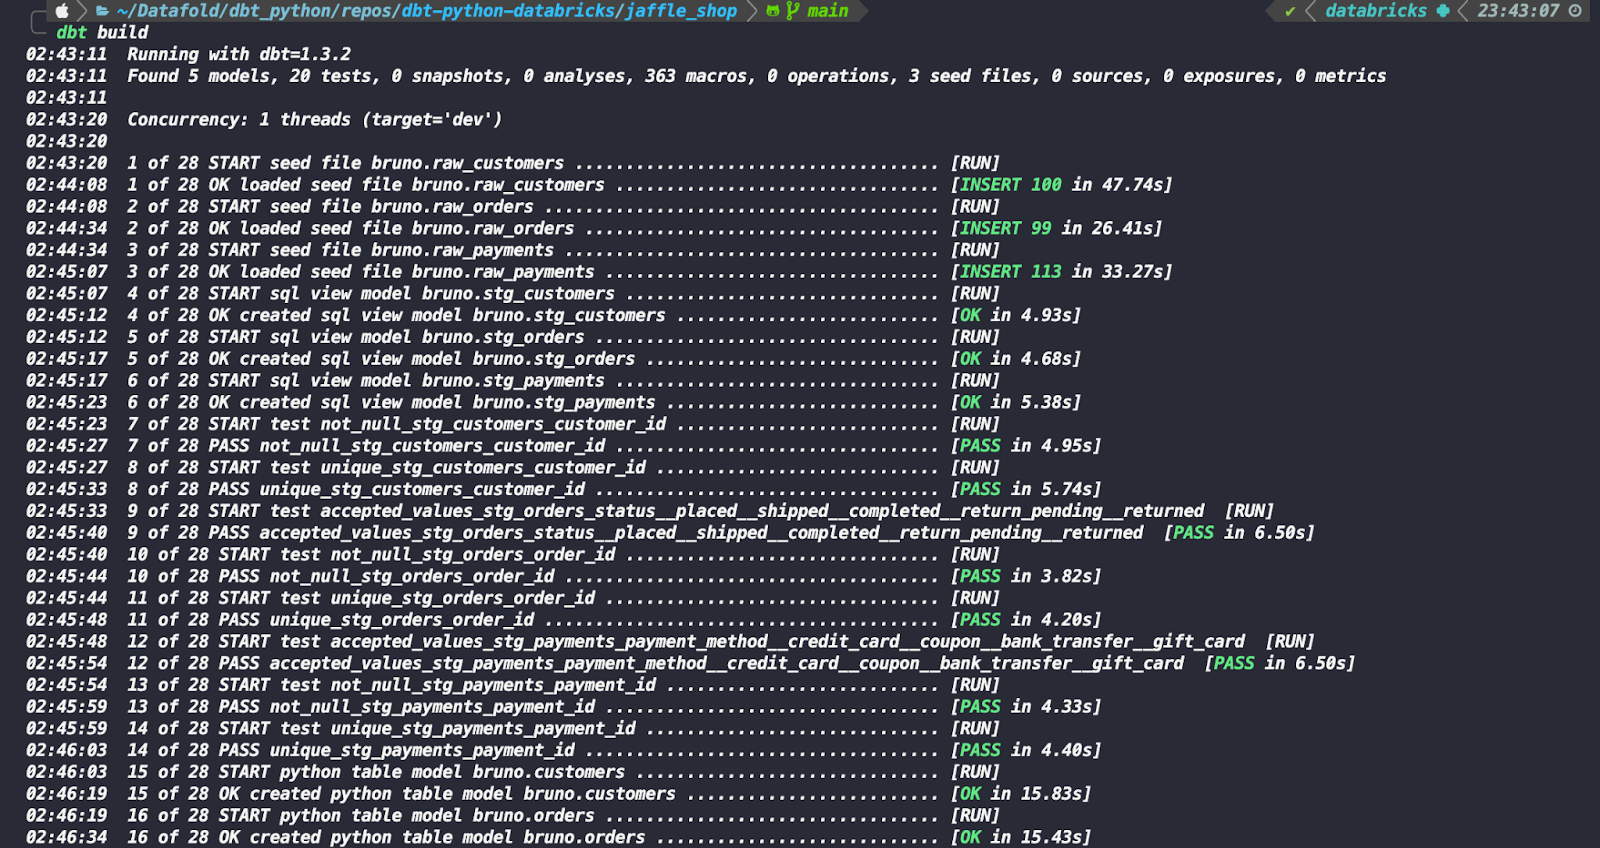
That's it! You built your first Python models in dbt with Databricks.
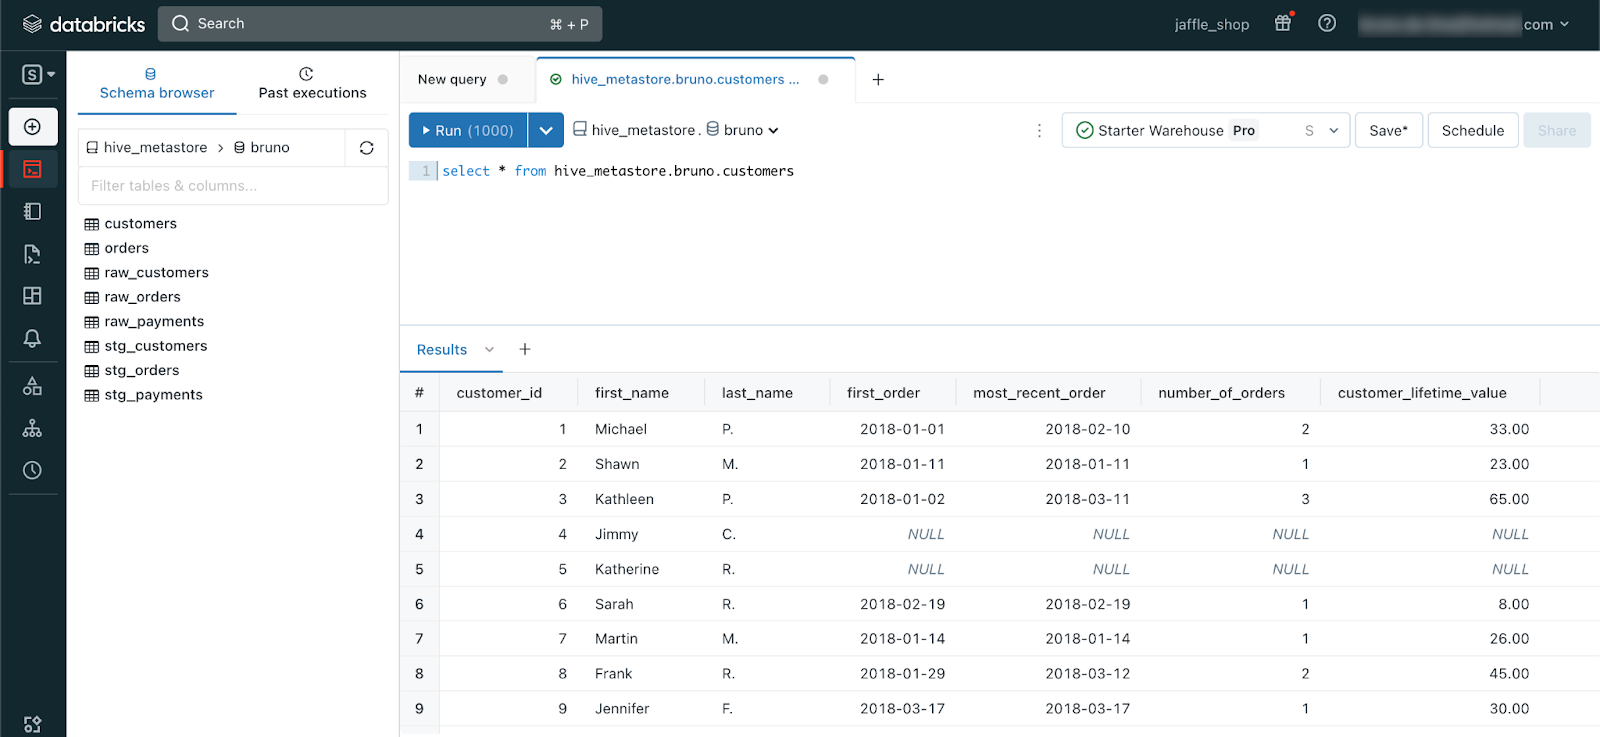
You can check the repository of the project here.
Pros and Cons
Pros
- Uses PySpark, which is more commonly used than Snowpark.
- Databricks clusters have more options to install packages (Conda, Virtualenv and PEX).
Cons
- The setup process can be a bit more complex as it requires creating a cluster.
- Using the trial account and the smaller warehouse of both Databricks and Snowflake, Snowflake was found to be faster.
How to build dbt Python models in BigQuery?
You can build dbt Python models in BigQuery with the dbt-bigquery adapter while your code is run in a Dataproc cluster.
Google Cloud Platform setup
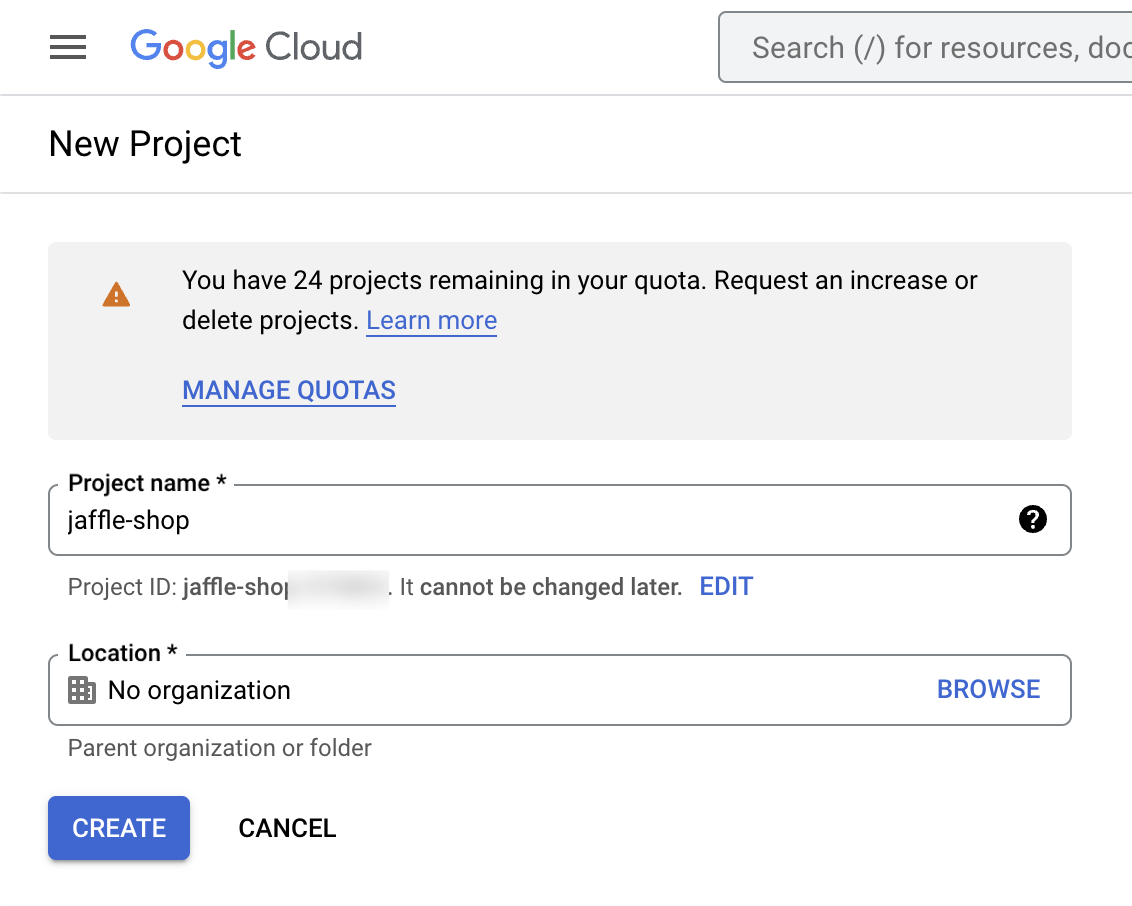
To begin, create a Google Cloud Platform account. In the console, create a new project named "jaffle-shop".
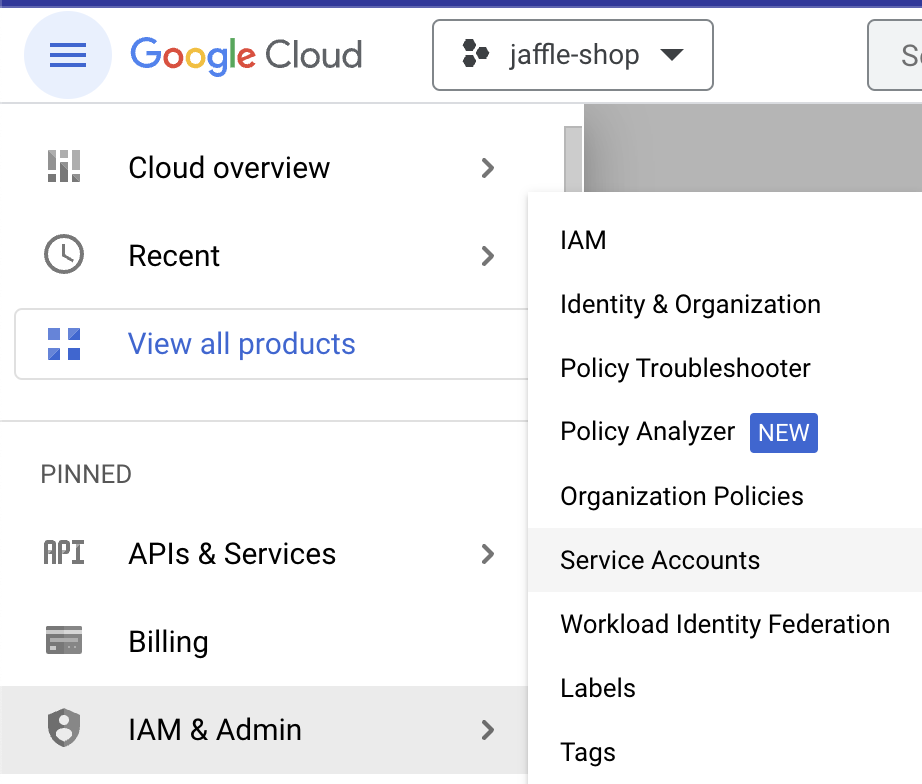
Now let's create a Service Account (SA) which will be used by dbt. For that, go to "IAM & Admin" > "Service Accounts" and create a SA.
Give a name to the SA, such as "dbt-python".
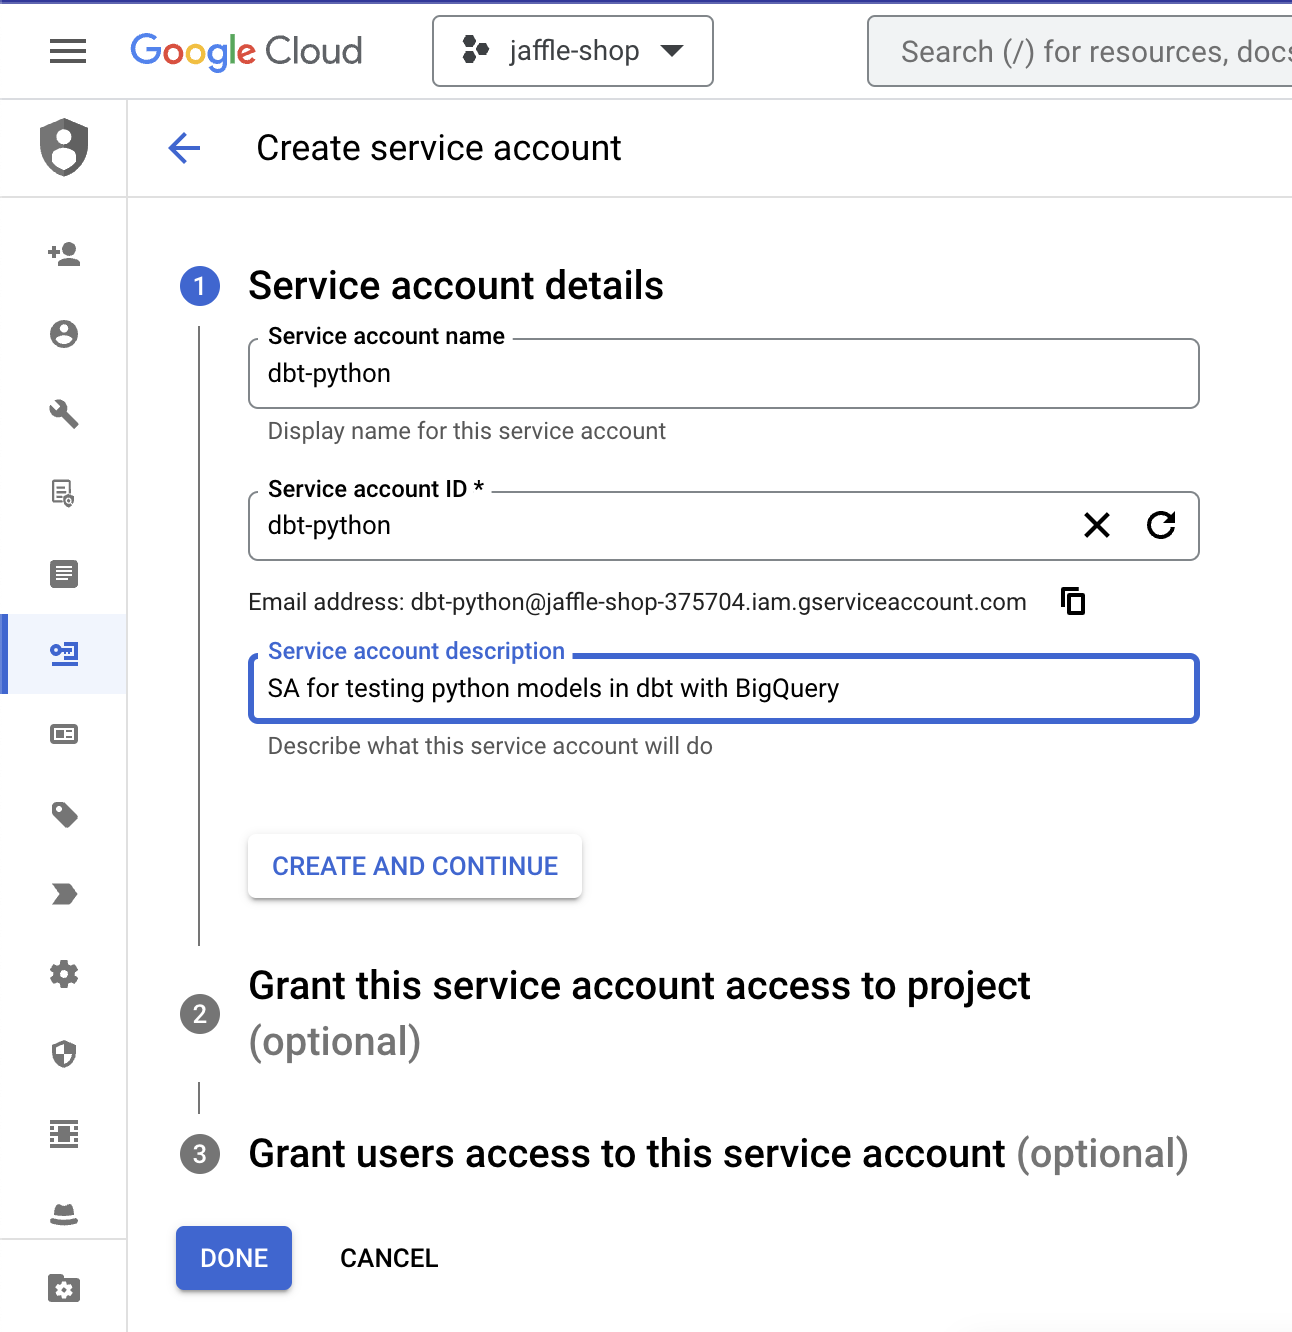
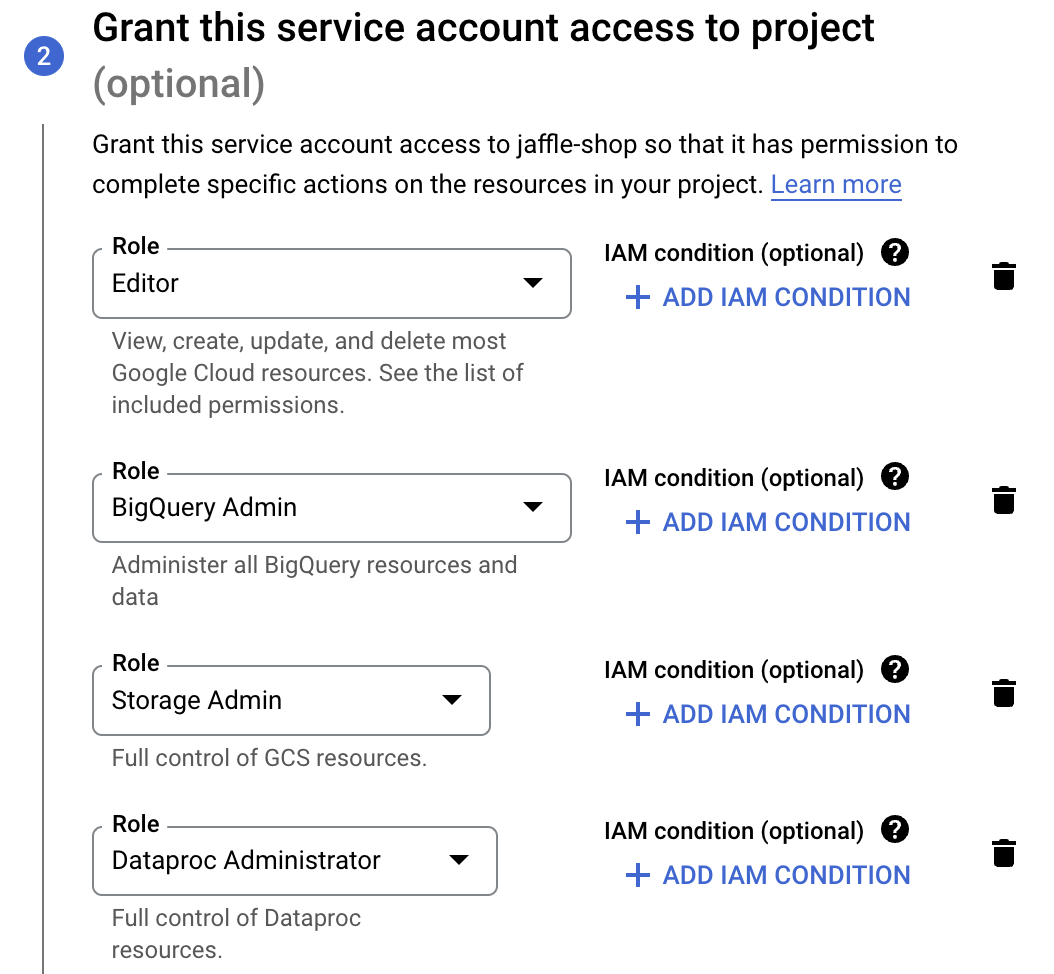
Now you have to define roles for the SA. For simplicity you are giving resource admin permissions. However, if you want to follow the principle of least privilege, you can check what are the exact needed permissions here.
Create the SA, and then go into "Actions" > "Manage keys", because you need to create the key file.
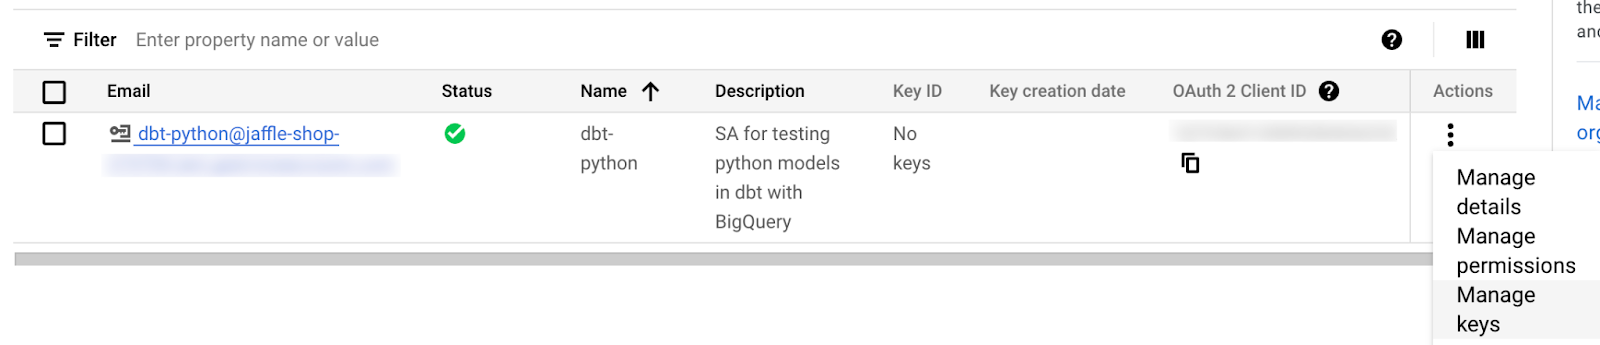
Hit "Add Key" > "Create new key", choose JSON and click on "Create". The private key will be created and a .json key file will be downloaded. Make sure you will save it carefully, you will need the information in it.
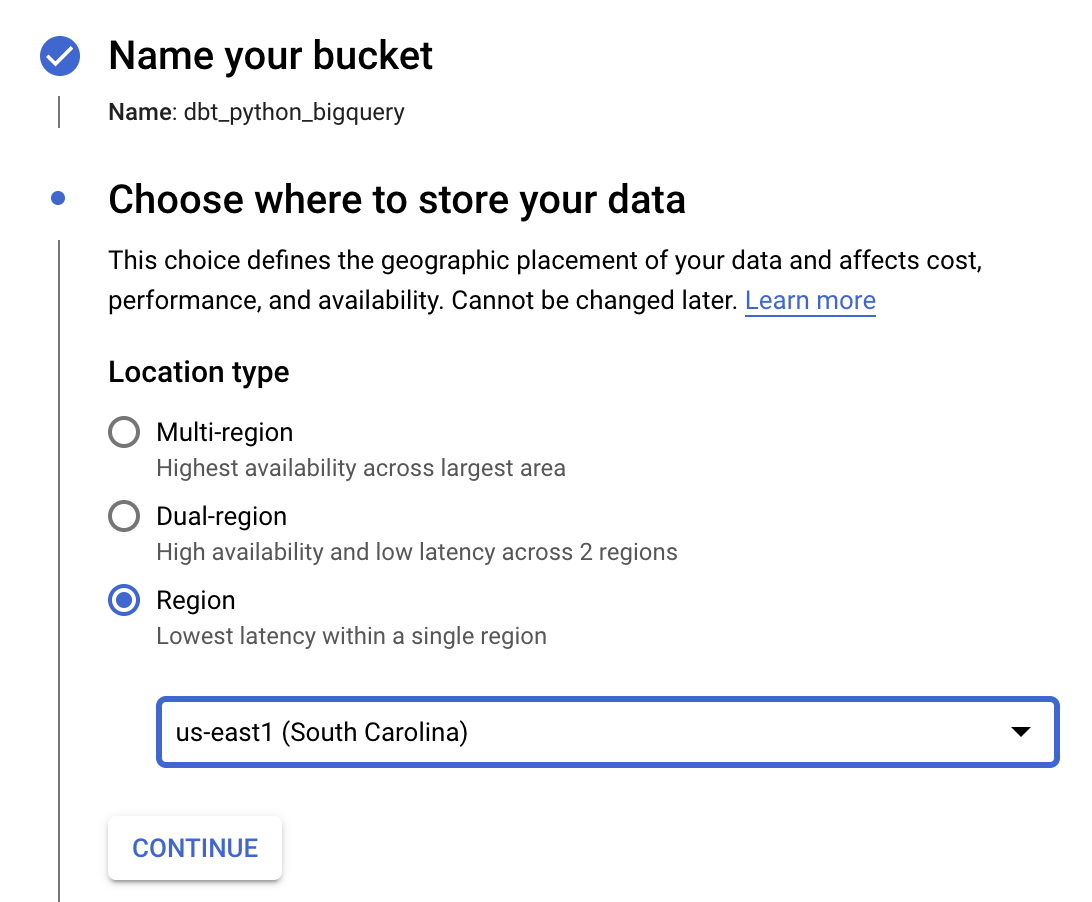
Now you have to create a bucket. Search for "Cloud Storage" in the console and click on "Create Bucket". Name your bucket, choose a Region and create the bucket. You can choose Region instead of Multi-Region to save costs. Keep in mind the name of the bucket and the region as you will use them in later steps.
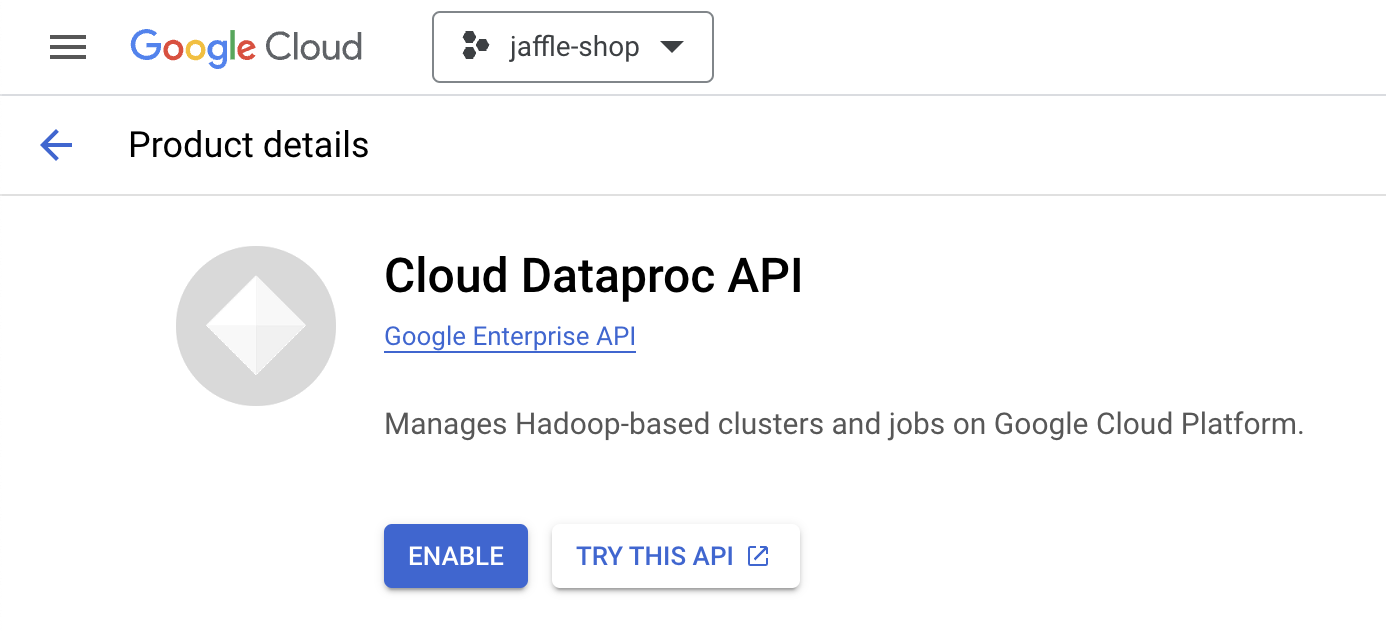
Now go to the Marketplace and search for "Dataproc API". Enable the Cloud Dataproc API.
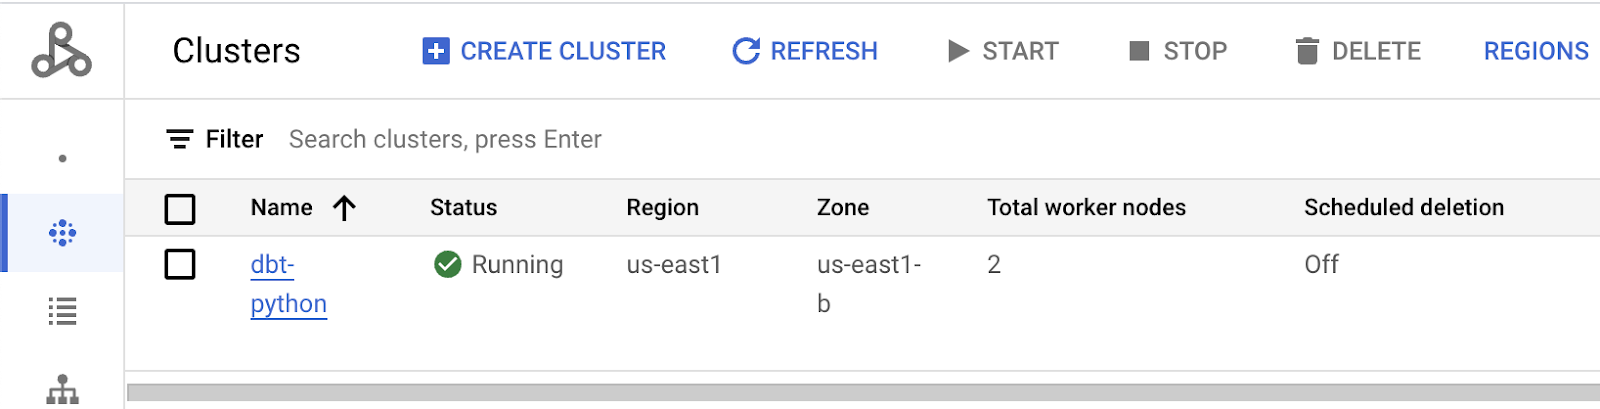
Now let`s create a Dataproc cluster. In your console, go to "Dataproc" and click on "Create Cluster". You can choose Cluster on Compute Engine.
Name the cluster (you will need this name), choose the same region as your bucket, and leave the type standard.

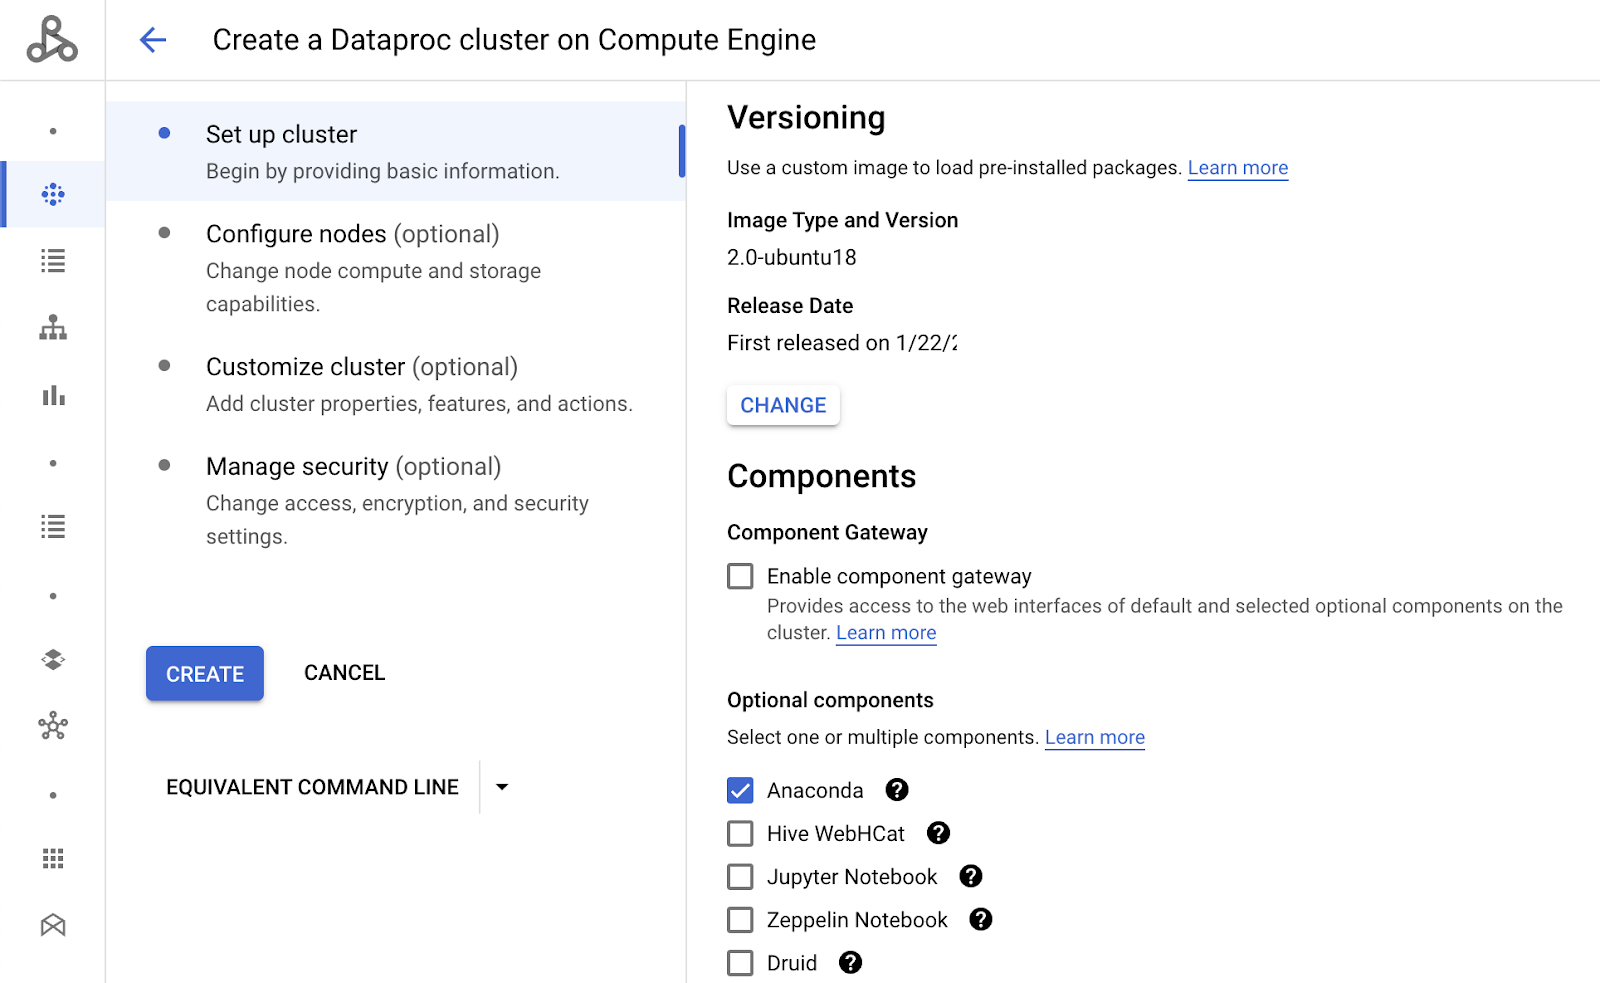
You can choose components like Anaconda for your cluster, you will have to change the Image Type and Version to do so.
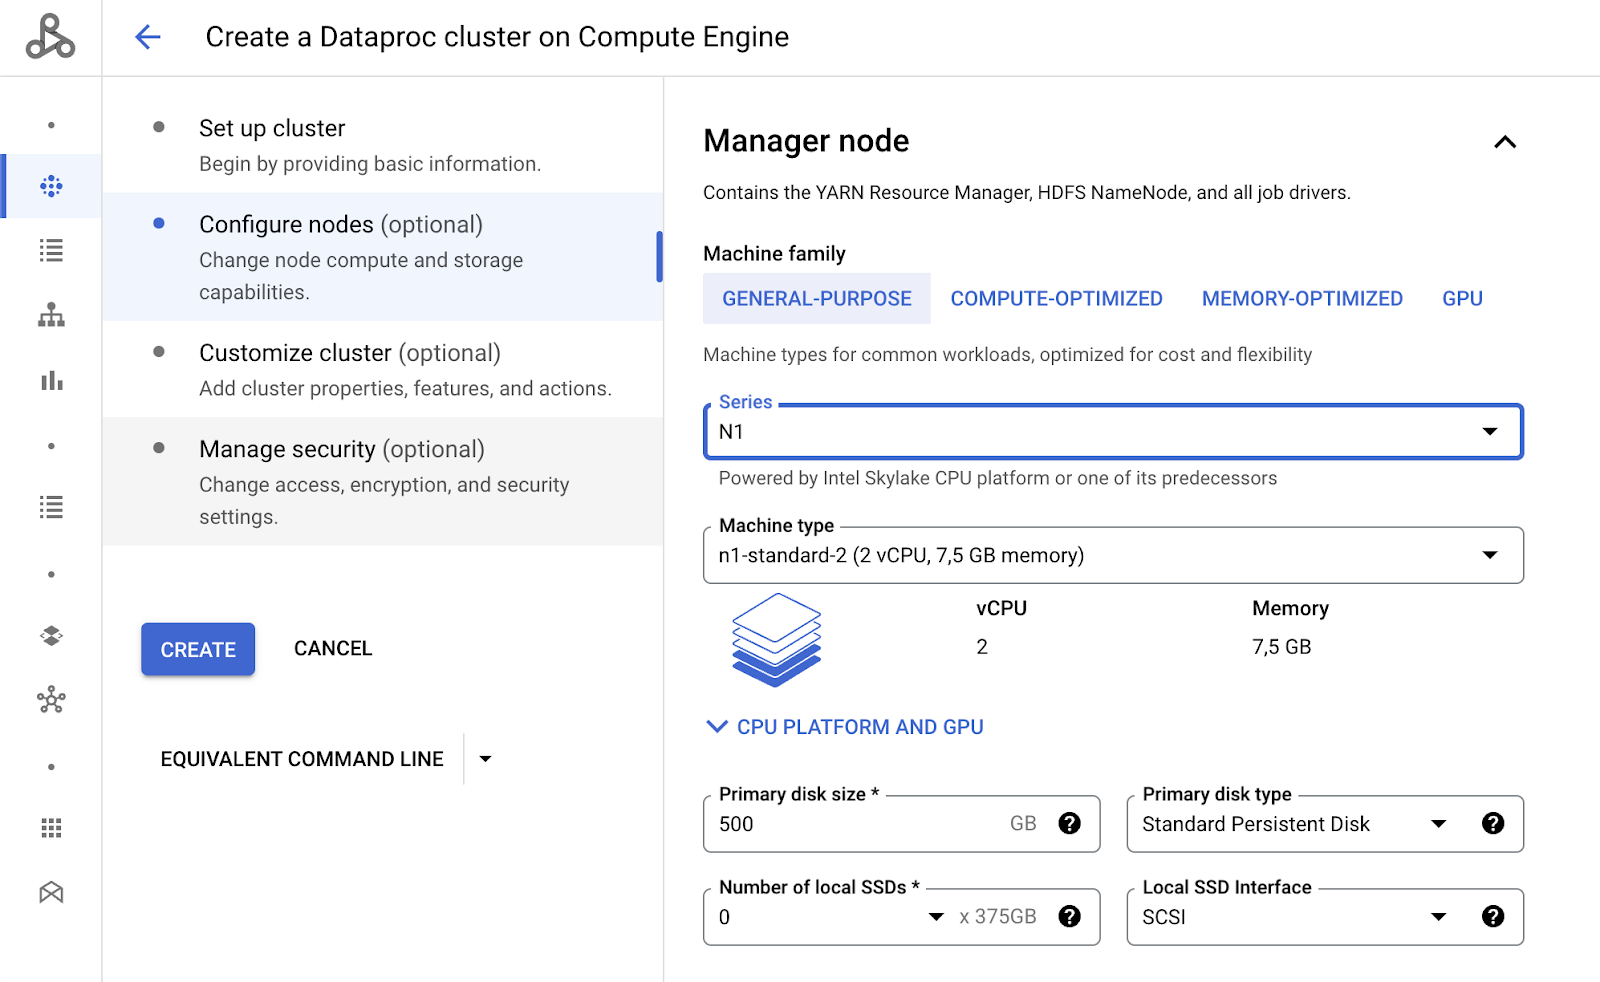
If you are using the default quotas for your account, you will need to change the Series and Machine type of your Manager and Worker nodes. Choose n1-standard-2 to avoid exceeding quotas. Scroll down and do the same for the Worker nodes.
Define the Initialization actions and the cluster metadata. Paste this into the Initialization action:
gs://goog-dataproc-initialization-actions-${REGION}/connectors/connectors.sh
And paste the following metadata as shown below:
bigquery-connector-version=1.2.0
spark-bigquery-connector-version=0.21.0
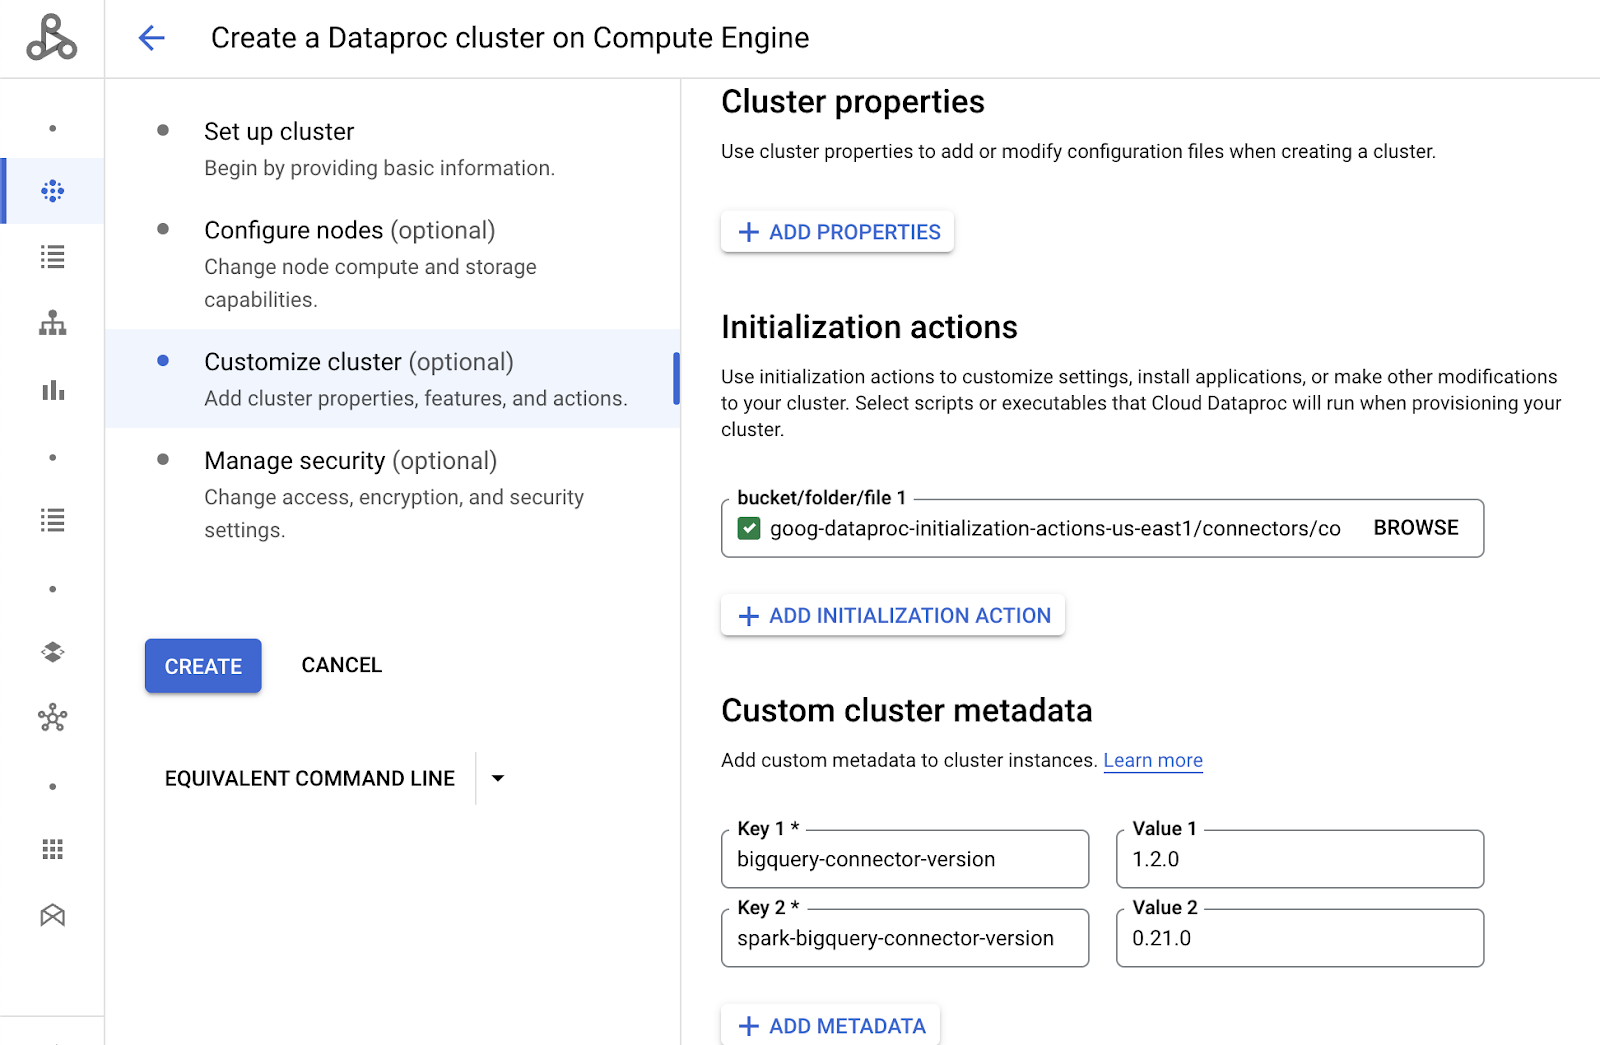
The google recommendation for production environments is to put this information in a bucket and make the cluster read from there. For simplicity of the tutorial, you are pasting it into the cluster properties.
Congratulations, your GCP configuration is now complete! Let's move on to dbt.
dbt setup
Install the BigQuery adapter running:
You'll need to create a new profile inside your ~/.dbt/profiles.yml file. Here's an example of what that might look like:
You will need your project-id, the information in your .json key file, the name of the bucket and the region of your cluster.
Create in your models folder the customers.py and orders.py files.
Example customers.py code for defining a dbt Python model in BigQuery.
Example orders.py code for defining a dbt Python model in BigQuery.
The scripts used in this tutorial are largely similar to those used in the Databricks tutorial, as the Dataproc cluster also utilizes PySpark.
Even the parameters of the dbt.config()function are similar. You have the "submission_method", which can now be either "serverless" or "cluster", and you have to specify the name of the cluster.
You can read more about the config for Python models in BigQuery here. Now run dbt build:
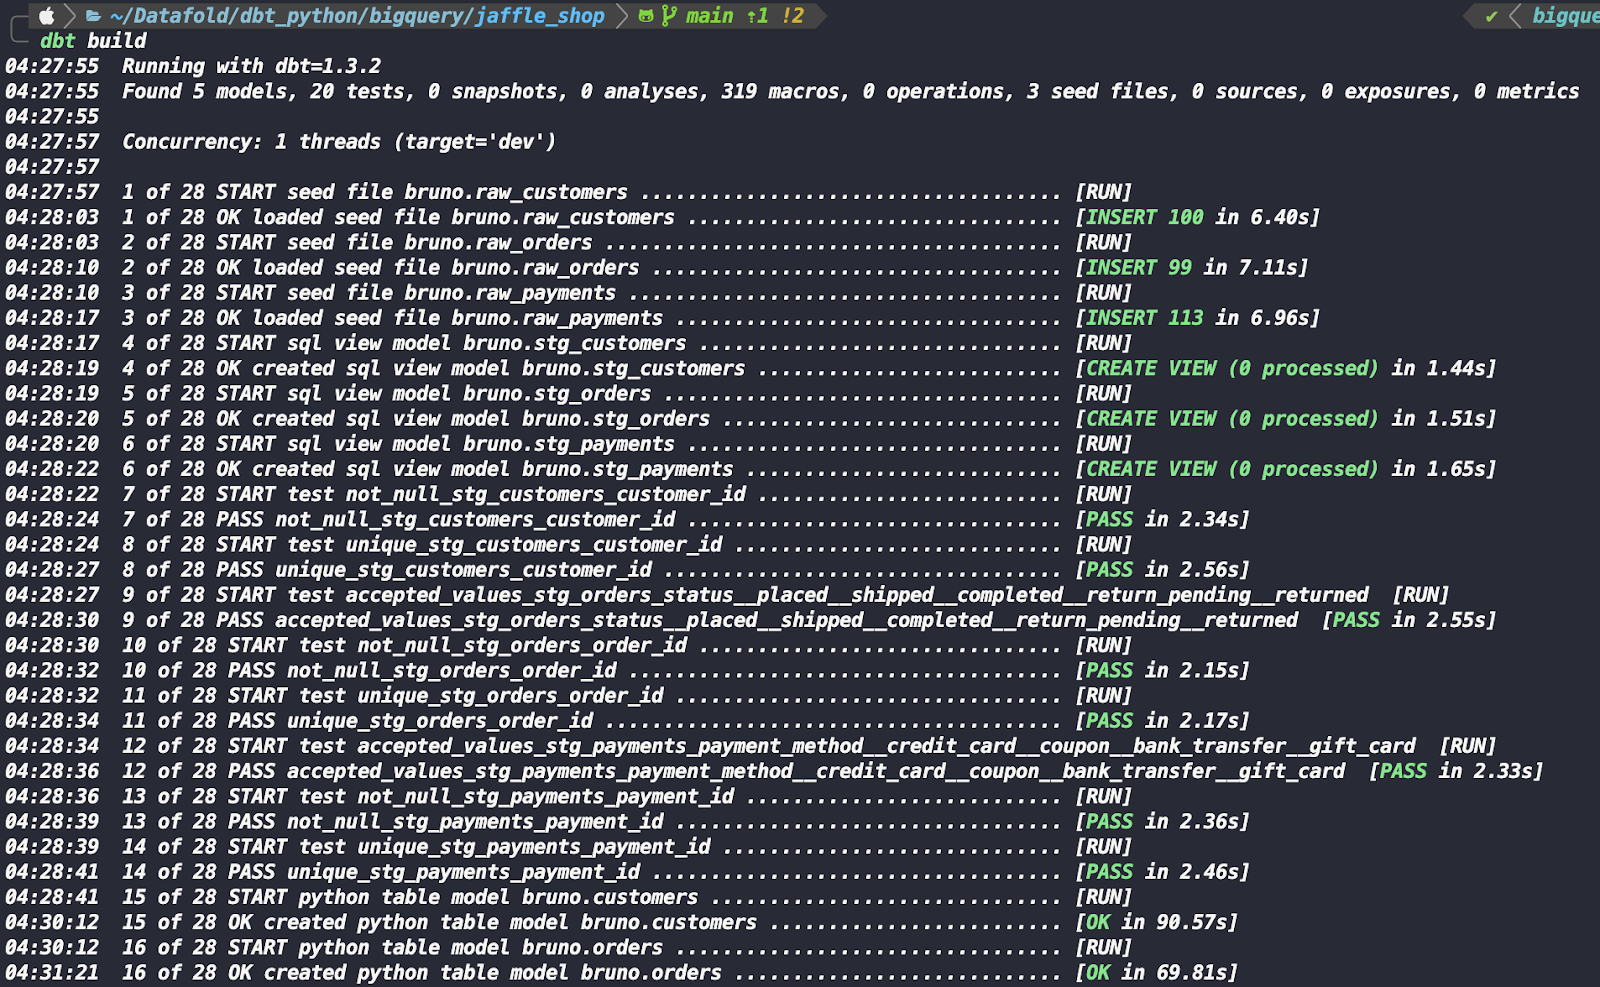
You have now successfully built your first Python models in dbt utilizing the BigQuery adapter.
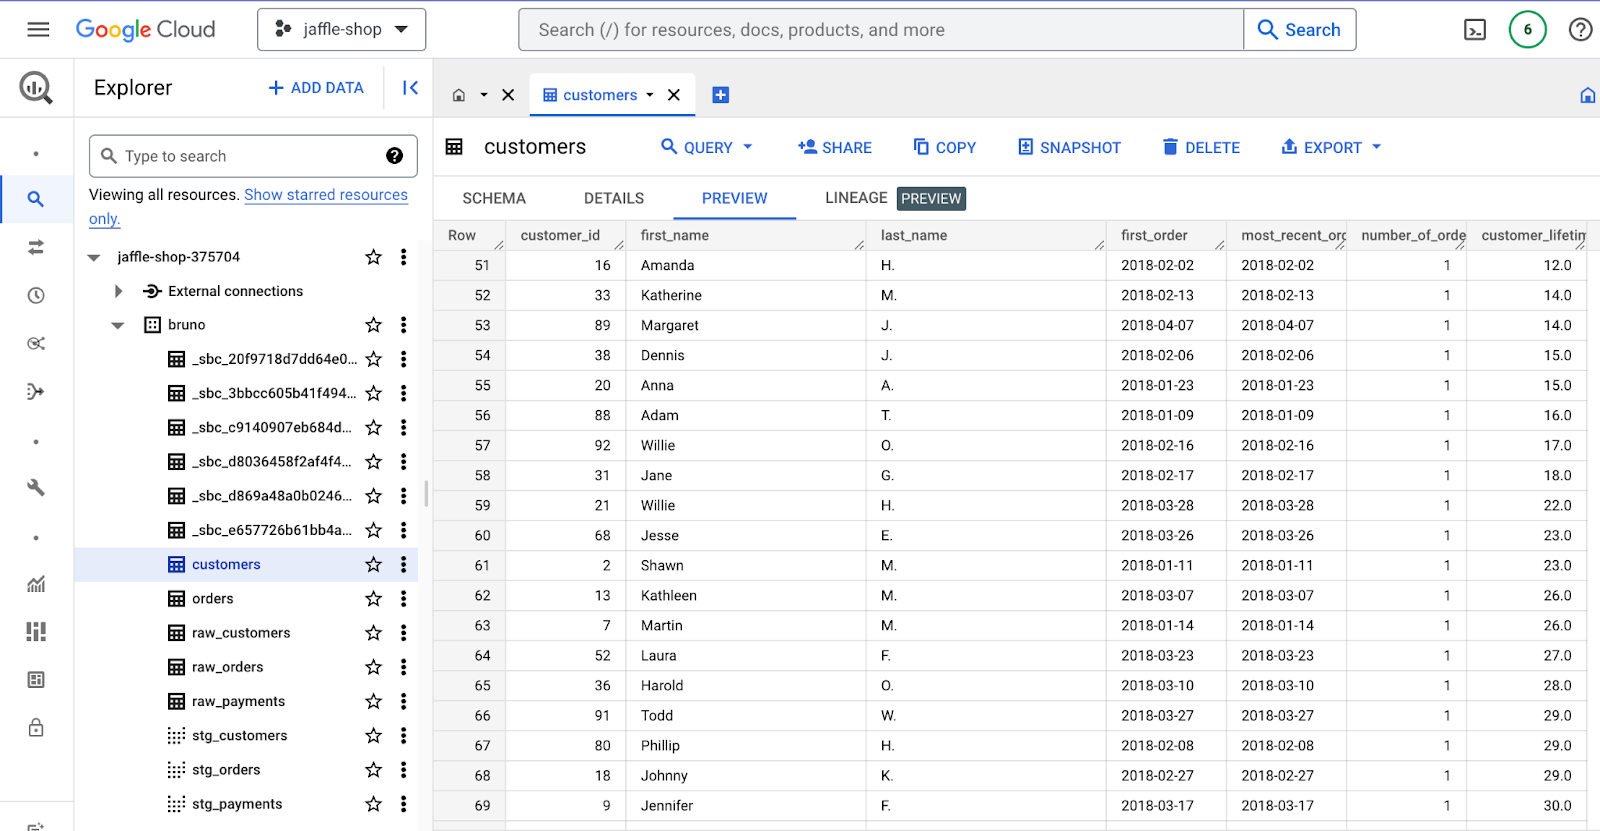
You can check the repository of the project here.
Pros and Cons
The Pros and Cons of dbt-bigquery are similar to dbt-databricks.
Pros
- Uses PySpark, which is more commonly used than Snowpark.
- Dataproc clusters have more options to install packages
Cons
- The setup process can be a bit more complex as it requires creating a cluster.
- Using a cluster that does not exceed the default quota can result in longer run times for your code when compared to using Databricks or Snowflake.
How to build dbt Python models with fal?
dbt-fal is a powerful third-party tool by Features & Labels that enables you to run Python code locally, rather than relying on cloud-based resources.
This package is versatile, as it can also be used to execute Python scripts for a variety of purposes. However, this tutorial will focus on utilizing dbt-fal to create models.
fal setup
The setup for fal is relatively straightforward. Since it runs with another adapter (any dbt adapter), you must select one. For this tutorial, you will be using the BigQuery adapter. Therefore, all you need is a project on GCP and a service account. You can refer to the first steps in the "GCP Setup" section for guidance on how to set this up.
dbt setup
Install dbt-fal and dbt-bigquery, you will also need the pyarrow package. And since dbt-fal is only compatible with dbt v1.3, you must install dbt-bigquery v1.3.0.
You'll need to create a new profile inside your ~/.dbt/profiles.yml file. Here's an example of what that might look like:
This profile is very similar to the one you did in the BigQuery tutorial but without the bucket and dataproc parameters. Our output is of the "fal" type, which points to the output with the "bigquery" type. Additional information can be found in the ".json" key file.
Create in your models folder the customers.py and orders.py files.
Example customers.py code.
Example orders.py code.
The default dbt-fal dataframe is a Pandas dataframe. So, you are using Pandas methods in the code. Now run dbt build:

You've done it! You've built your first models in Python using dbt, fal, and BigQuery.

You can check the repo of the project here. Check the fal dbt docs to learn how fal further extends dbt's functionality to run Python scripts before and after dbt models.
Pros and Cons
Pros
- If you want to run your Python scripts locally, now you can!
- Uses Pandas df as default, which is very popular among data practitioners.
- Ideal for prototyping as you don't need to pay for cloud resources.
- Works with any dbt adapters.
- Very simple to configure.
Cons
- Not good for big data and distributed processing.
- Your data has to move outside your data warehouse.
Conclusion
In this article you delved into creating Python models in dbt, exploring their features and benefits. You also examined four different ways to utilize Python models, including the use of adapters from dbt Labs and a third-party adapter, dbt-fal.
We didn't explore the main capabilities of Python models such as DS and ML as this is a first tutorial and the focus was on how to run it. The Python codes for the models in these tutorials turned out to be worse to read than the SQL codes, but there are some cases for more advanced applications where the Python model is way cleaner.
We can summarize the pros and cons of each adapter in this table.

If you're looking for an easy and fast way to test the capabilities of Python in dbt and prototyping, I recommend trying out dbt-fal, because you can run it on your machine. It's very quick to configure and you can run your scripts faster.
But if you are planning for production and must/want to keep all your data in the cloud, Snowflake is a great option. Snowflake is also very easy to configure and snowpark is a very handy tool, treats your code as a stored procedure and you don't have to manage any clusters. Finally, I strongly recommend you to read the official documentation on dbt Python models for more information.
About the author
Bruno Souza de Lima is an Analytics Engineer and Tech Writer. He believes in the power of data to drive success and help businesses make informed decisions. In his career he helped to implement the Modern Data Stack in Enterprise clients across LatAm, and soon across the world.
Datafold is the fastest way to validate dbt model changes during development, deployment & migrations. Datafold allows data engineers to audit their work in minutes without writing tests or custom queries. Integrated into CI, Datafold enables data teams to deploy with full confidence, ship faster, and leave tedious QA and firefighting behind.